Muni toons: SFMOMA soapbox derby car
Muni toons rolling down the course, McLaren Park, April 10th, 2022
Background
The SF Museum of Modern Art hosted a couple Soapbox Derby races in the 1970s, and decided to bring it back for 2022.
Janet Delaney was one of the original contributors, and she was invited back this year. She didn’t have the time to create her own car this time however, so invited my co-worker and friend Sam Haynor to take on the task. He immediately turned to Gaia Liu and I (just like for our work on Something Labs).
Sam and I brainstormed about what might be fun, and I quickly settled on wanting to do something with feet-wheels. Not a new idea, but something I’d never done, and would be a significant technical challenge. I’m not really an “art” person, so all I was interested in was something technical to work on. Sam and Crystal would be responsible for the aesthetic part of the project, while Gaia and I would do the mechanical part.
Eventually the plan of a fantasy Muni bus was settled on, and I could start designing the mechanical parts.
Hubs
We modelled a couple potential solutions, first a solid machined hub, with pockets for 1.5in 8020 extrusions for legs. Since we don’t have access to a 5 axis CNC machine, this would have meant quite a few setups, though identical toolpaths. FEA (and common sense) indicated this would be fine, so we thought about 3d printing from plastic the same hub design. Cheaper, faster but not nearly as strong.
FEA with a 3d printed ABS hub, loads at end of leg, both 100lbf, at right angles to each other is shown below. Bolts and washers supporting the the load are not modelled, and would have helped a lot. I think this solution would have worked, despite the FEA failing, but we never tried it in real life.
Another similar design for hub was to machine from aluminum plate
The design was adapted to have through bolts create contact locations for 2d machined plates. This would constrain the legs, and take up the moment loads from turning, and from when only the tip of the shoe is contacts the road. This yielded a boatload of bolts however. It was expected we could get away without the 4x bolts on the sides if we used the channel nuts on the 8020 itself.
We ended up making some plywood hubs, with machined pockets to register and take the moment loads. The tangential through bolt holes were still included, with the thought that perhaps we’d get the plywood delaminating and attempting to shear at this location. Holes are cheap to make, so we added them, on the off chance they’d be needed later. It turns out we didn’t need them.
Feet
Next up was the feet. Initially we’d just assumed we’d use the same thing as someone on the internet. Despite some reservations, we made a bent steel foot. It was incredibly flexy, and would absolutely not support the weight of this relatively heavy car, both in real life, and later in FEA (which i’m ashamed I didn’t do up front. it felt like it would be way too flexy, but someone else had gotten away with this design, so…).
The next step (pun intended) was to design something much stiffer. I designed a 2 part foot that was glued and screwed together. The crossdrilled screw clearance was machined from the side with a ball end mill. Tool clearance was anticipated to be an issue, so we carefully designed enough clearance for a particular 72 point ratcheting wrench, with a shortened bit.
A regular Allen wrench would not have allowed us to tighten the bolts, since the swing angle is 360/6= 60 degrees.
Instead we would use a 72 tooth ratcheting wrench with an shortened bit. This image shows that we could get 7 clicks from the wrench before resetting the swing.
Clearance in real life
Brakes, front axle
I wanted the brakes to be on the front wheels, since that’s where the most power would be (due to braking action effectively pushing weight forward as you brake).
Since we have feet-wheels, we couldn’t use rim brakes like most other people, and therefore had to go to disc brakes. I wanted to do something that could be easily re-used after the race, so opted for mountain bike brakes. However, for ease of use, adjustment and etc, I wanted cable actuated brakes.
This part would have to combine a few functions. Axle, steering pivot, brake mount, steering actuator mount.
This part ended up being a multi part weldment. There were a few nice quality of life features I made for myself here. One side of the pivot shaft had a 0.005” relief up to the point where the pressfit starts, allowing a much easier pressfit before welding. Similarly, the brake mounting plate was pressed onto a shoulder that located and squared it up. Clocking didn’t matter much, but the pressfit could be tapped to rotate it.
Everything was welded together after pressfit. It had been a while since i’d welded aluminum, but the welds mostly came out ok, and they held up on race day.
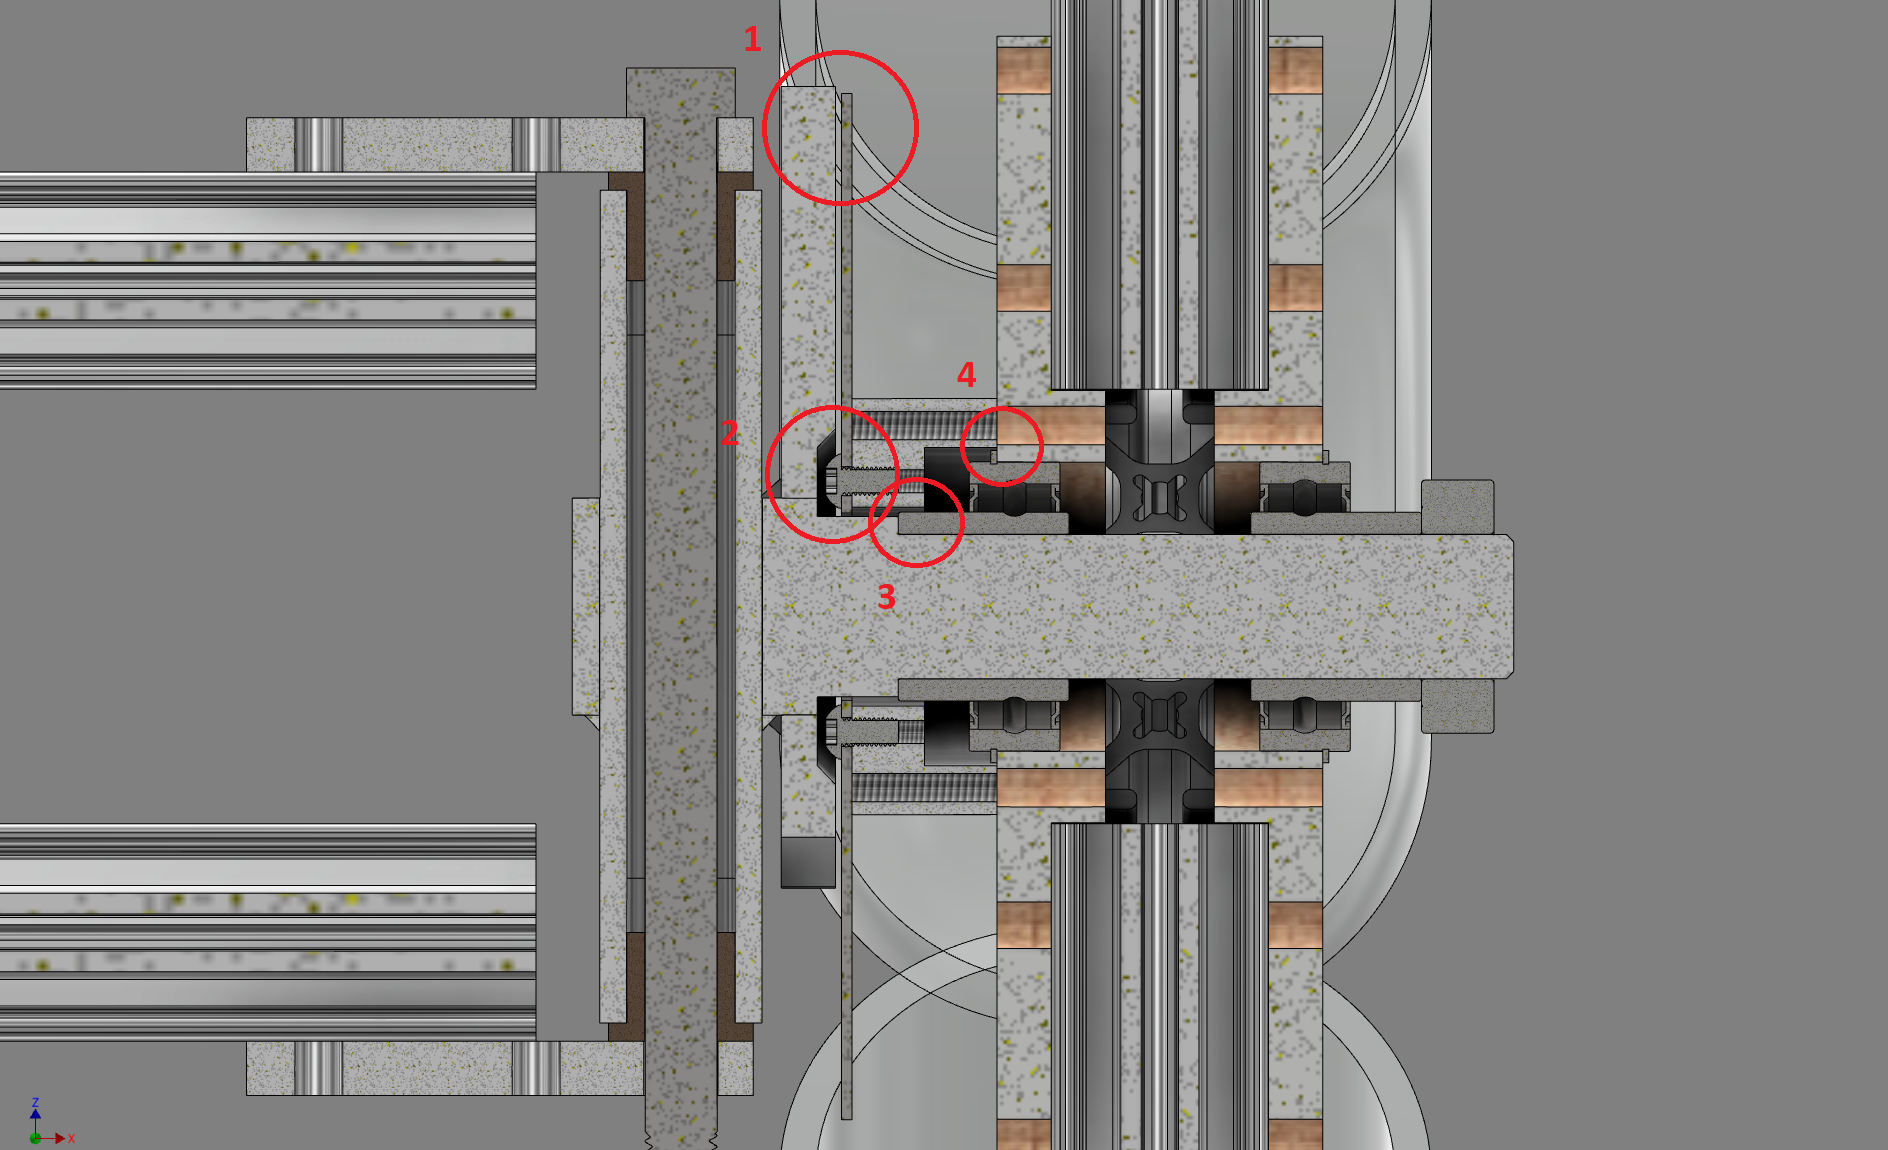
The design of the hub/brake/steering/axle interface was actually pretty constrained. There were lots of things that needed to not interfere with each other. Tight-ish clearance between lots of parts.
The disc rotor needed to get really close to the brake bracket, just because bicycle disc brake calipers are designed to have their mounting bolts close to the rotor.
Rotor bolts needed to not rub on axle or brake caliper mounting plate. On a bike, the chain stays are angled to allow much more clearance.
There is a spacer/adapter to allow a standard bike 6 bolt disc rotor to be used, while having larger bearings and axle than is standard for a bike. The extended inner race of the bearing needed to clear this.
There is a snap ring on the bearing, providing a flange for the bearing to align nicely (it’s pressed into plywood, after all.). This snap ring needs to clear the disc spacer. The disc spacer bolt circle diameter (to the wood) needs to be as small as possible, to maximize the 8020 insertion into the wood.
Assembly
The final assembly of the mechanical stuff was completed without too much to talk about. The mechanical part of the car was done and tested about a week before the race. We didn’t have the art side of things done though, so we opted to not really do testing on a hill, but rather just pushing it up and down on flat ground in the shop.
A teammate responsible for the steering didn’t have much figured out, so I helped to push that across the line too. It was pretty hack, but it worked enough for the race. It should really be shored up and rethought a little, should we want to drive this car again.
It used an off the shelf rack and pinion system for a go-cart, and scrap 8020 extrusions. We had to make an extra short handlebar to avoid the drivers knees and shins, and a coupler to the flange for the steering shaft.

SFGATE
With a week to go, a reported and photographer from SFGATE came to visit us.
Check out their writeup here:
https://www.sfgate.com/local/article/sfmoma-soapbox-derby-returns-17064537.php
Art
The “arty part” was completed pretty late, with only a few days to spare. I was out of my element, working with cardboard, scissors, tape, hot glue and no plan!
I made some wheel wells, did a bunch on bulk painting. We also had a programmable LED sign, that I programmed to mimic the muni sign, and we sourced a bunch of shoe related jokes and puns to run on it.
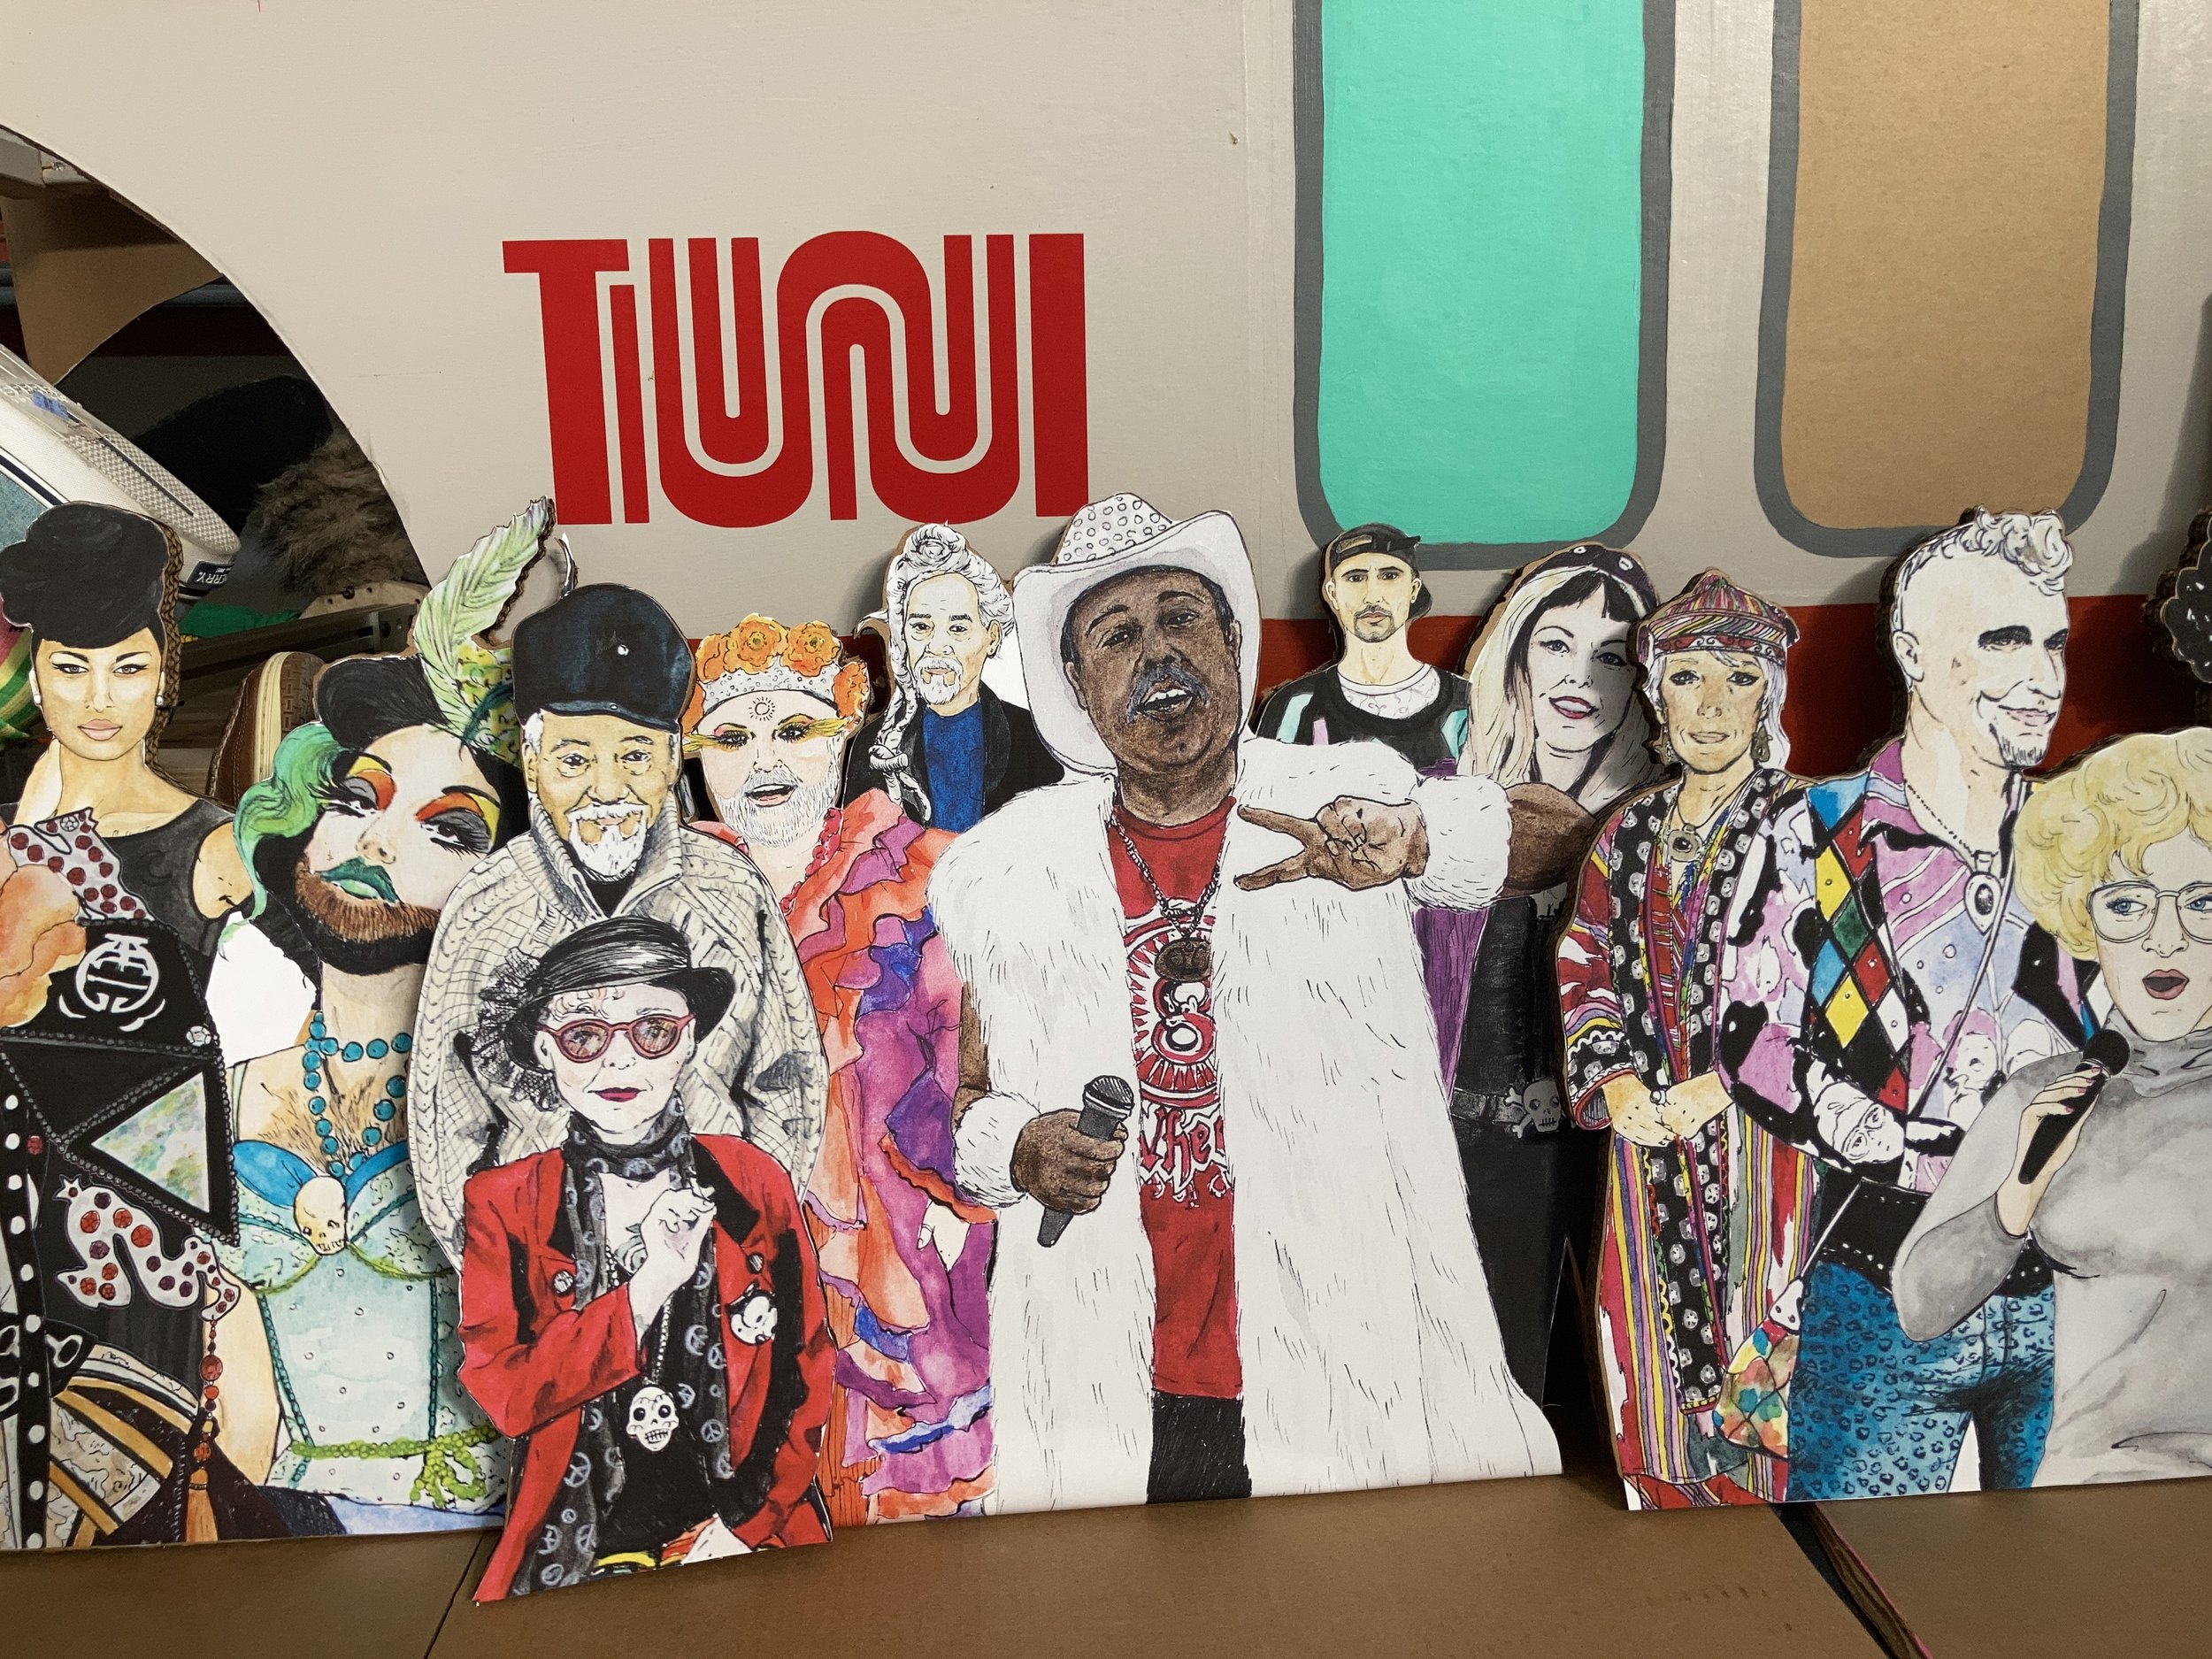
Crystal Vielula is the primary artist, and she leveraged a lot of her prior portraits of classic SF characters as the muni riders.
https://www.crystalvielula.com/
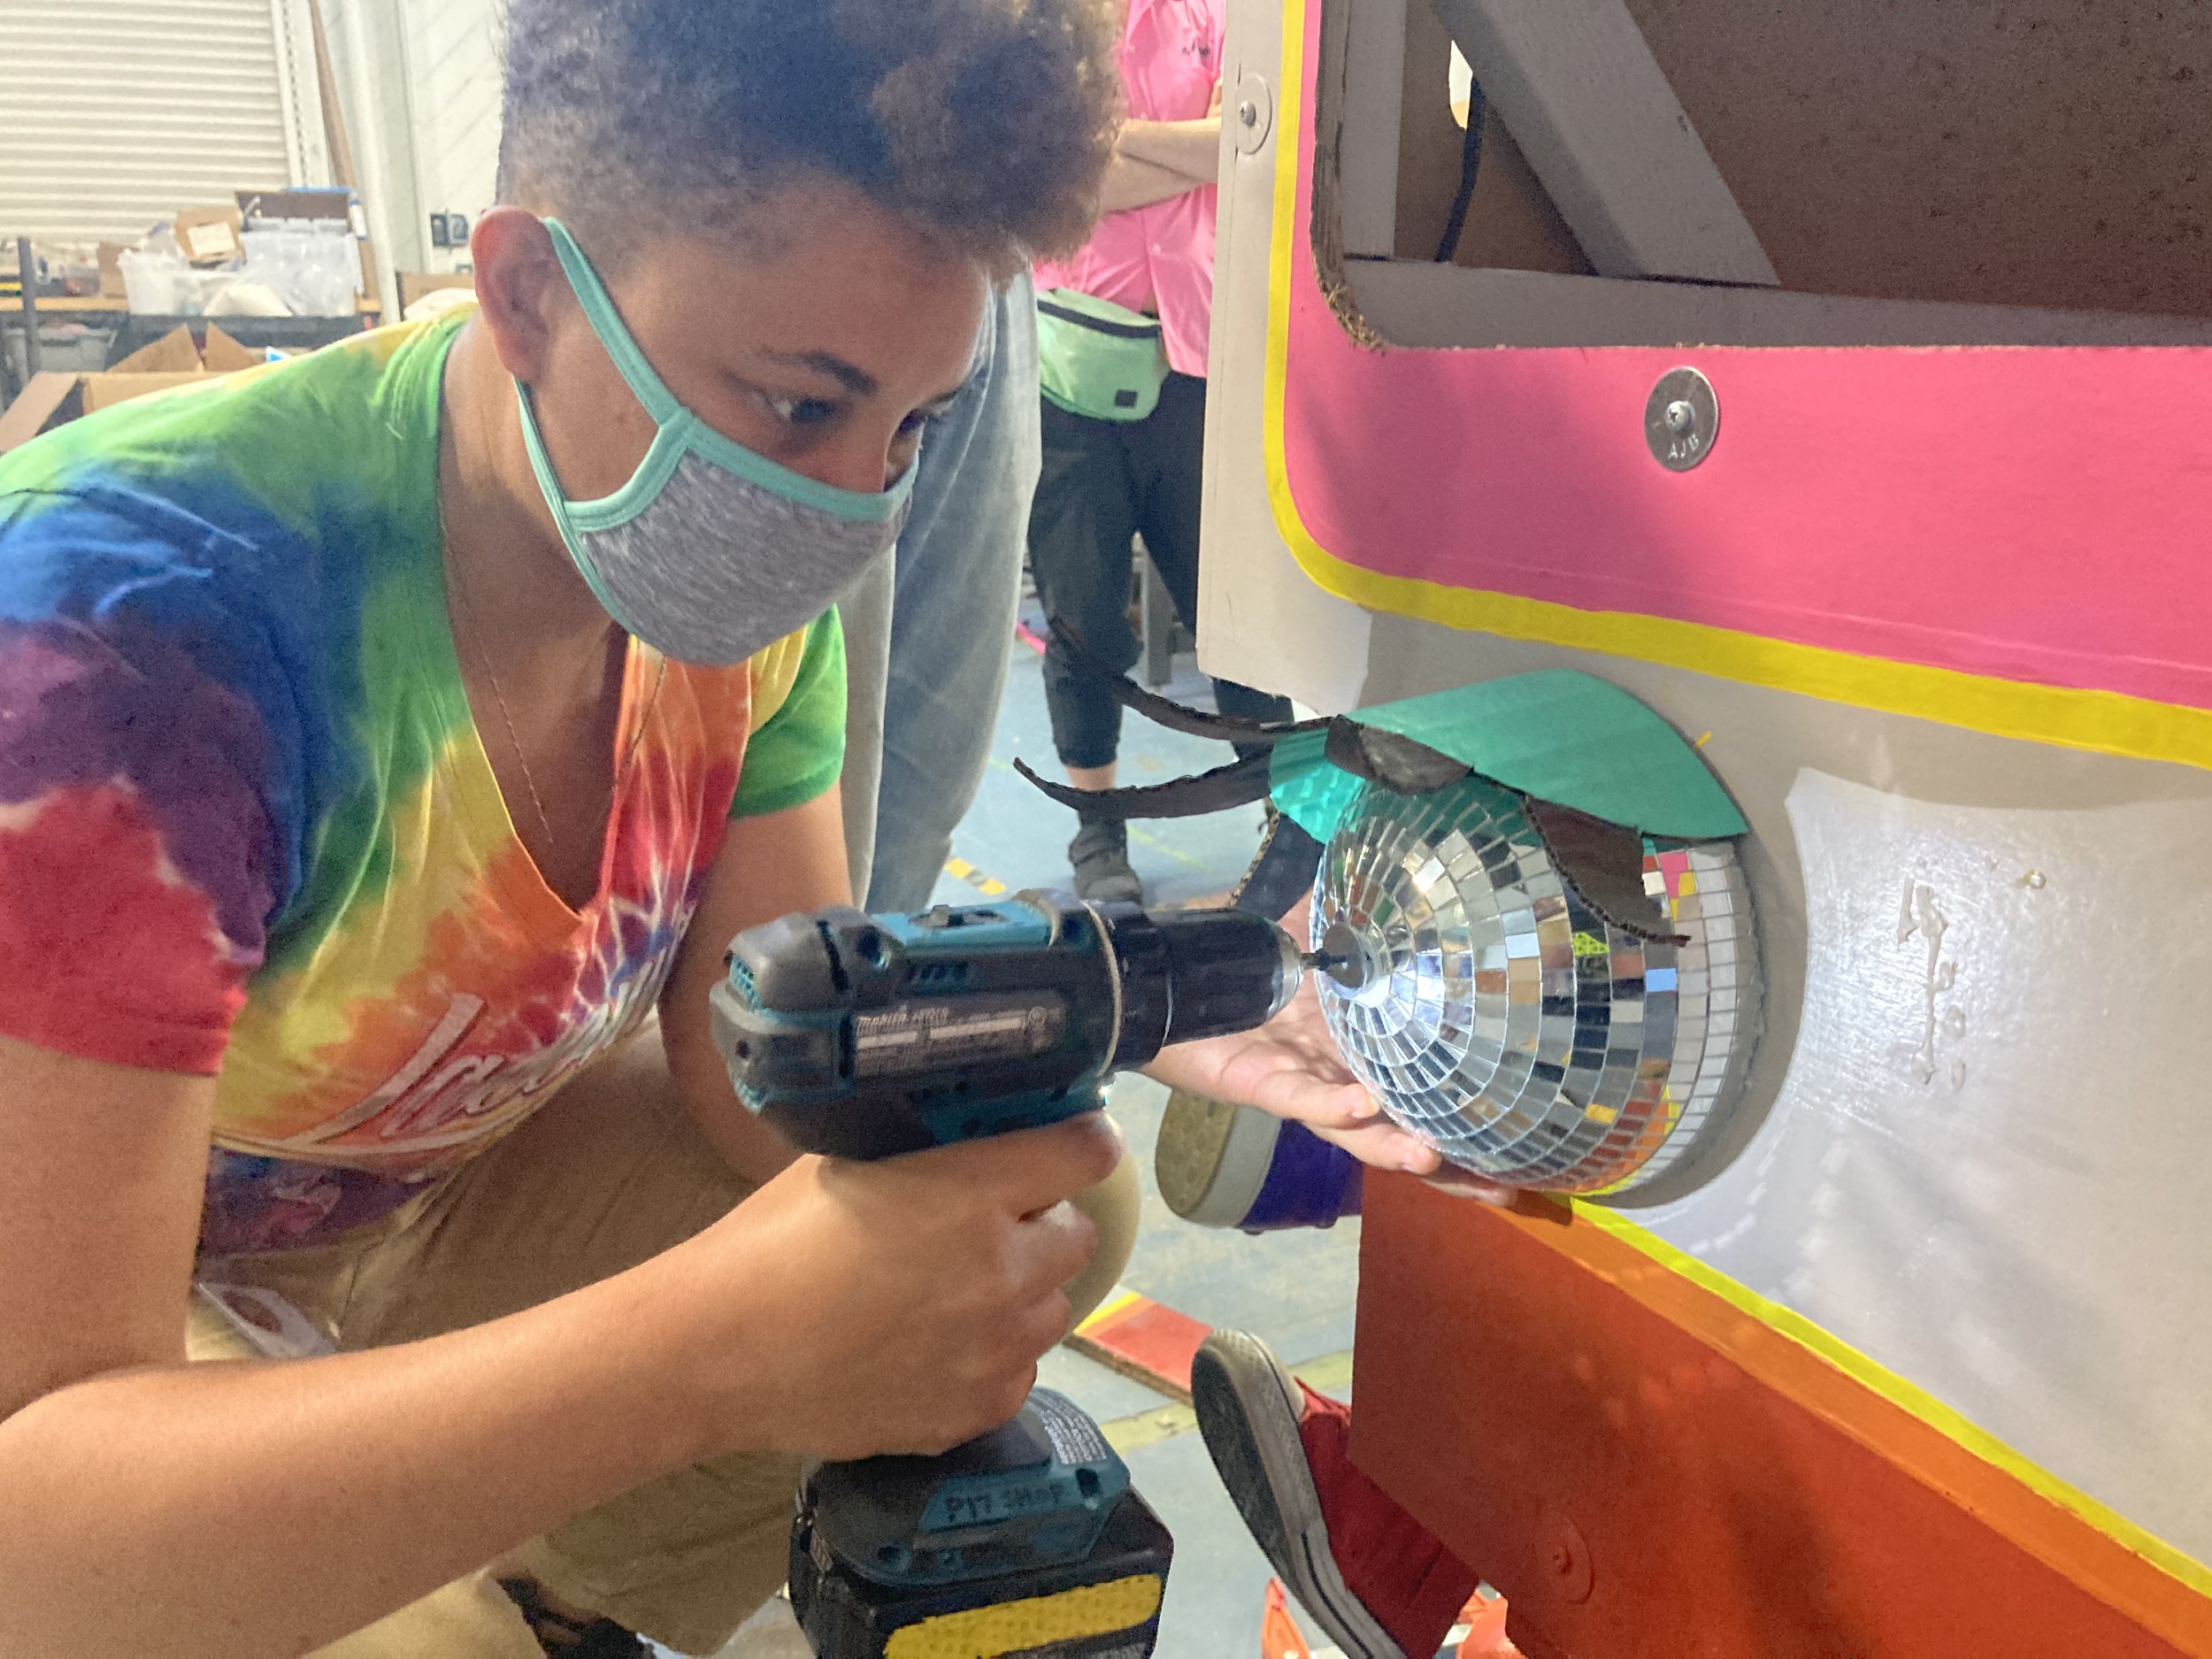
The bus has a bubble machine exhaust, and disc ball eyes.


Gaia did a bunch of great work on mounting the shoes to the feet, which turned out to be a pretty lengthy job.

Race
“Race” day was really fun. Enjoy the awesome video that Sam put together below! Chelsea, our driver, apparently didn’t touch the brakes! Brave soul, but absolutely the right move. Some people in attendance were actually a little disappointed that the feet didn’t fly off! If we had it to do over, I think we should have integrated a shoe cannon to catapulted a dozen shoes into the air on command, perhaps as we crossed the finish line, or went over the speed bumps? Perhaps some mechanism to drop shoes out of the wheel wells as we go along, to give the illusion of shoes falling off, without endangering the driver with actually having shoes fall off.